EPP - English Paper Piecing Tutorial: Part One

Welcome to SewPsyched!!


4. Fold the next flap, up from your initial flap, over onto the template.

5. Tack in place by inserting needle from the TOP Down, into the upper flap, and directly down into the lower flap, angling out as seen in the photo below. You WILL NOT be piercing or sewing into the paper!!
 Make sure there is no bump where the needle comes out of the lower/under fabric. Inserting your needle as vertically as possible into the upper fabric, piercing the lower fabric and then angling out, will help enormously with this.
6. Hold the end of your thread and repeat your needle insertion

 Notice that the needle is OVER TOP of the thread. When you pull the needle completely through, this will make a 'knot'. Keep holding that thread end until you've pulled the needle completely through :)
 Done!
Done!
7. Move Upward to the next corner. Fold the fabric over onto the template and repeat inserting the needle top down into the fabric, and gently pulling the needle and thread through, keeping it to the right of the thread that forms the stitch (see below).
 Each time you finish a corner and move upwards to the next corner, you are holding your last stitch in place. Continue around until you complete the last stitch by moving the needle under your thread to form a knot, or by making two stitches in place. Clip the thread slightly less than 1/2" long. This longer tail will help hold your stitch in place as you work with your finished piece, later.


Welcome to SewPsyched!!
Today's tutorial is all about English Paper Piecing (EPP), how to thread baste, The Next post will show you how to Glue Baste and the Third post will show you how to assemble a project and how to assemble the Paperie Pillow of Lerve. Bookmark the pages so you can come back whenever you like!
EPP has no relation to regular Paper Piecing. So when you think of EPP, think of sewing by hand, and making complicated patterns, easily, from different geometric shapes. These geometric shapes range from Hexagons to Triangles, to Pentagons, to Decahedrons, to many types of Diamonds. So FUN!!
Preparation:
You will need:
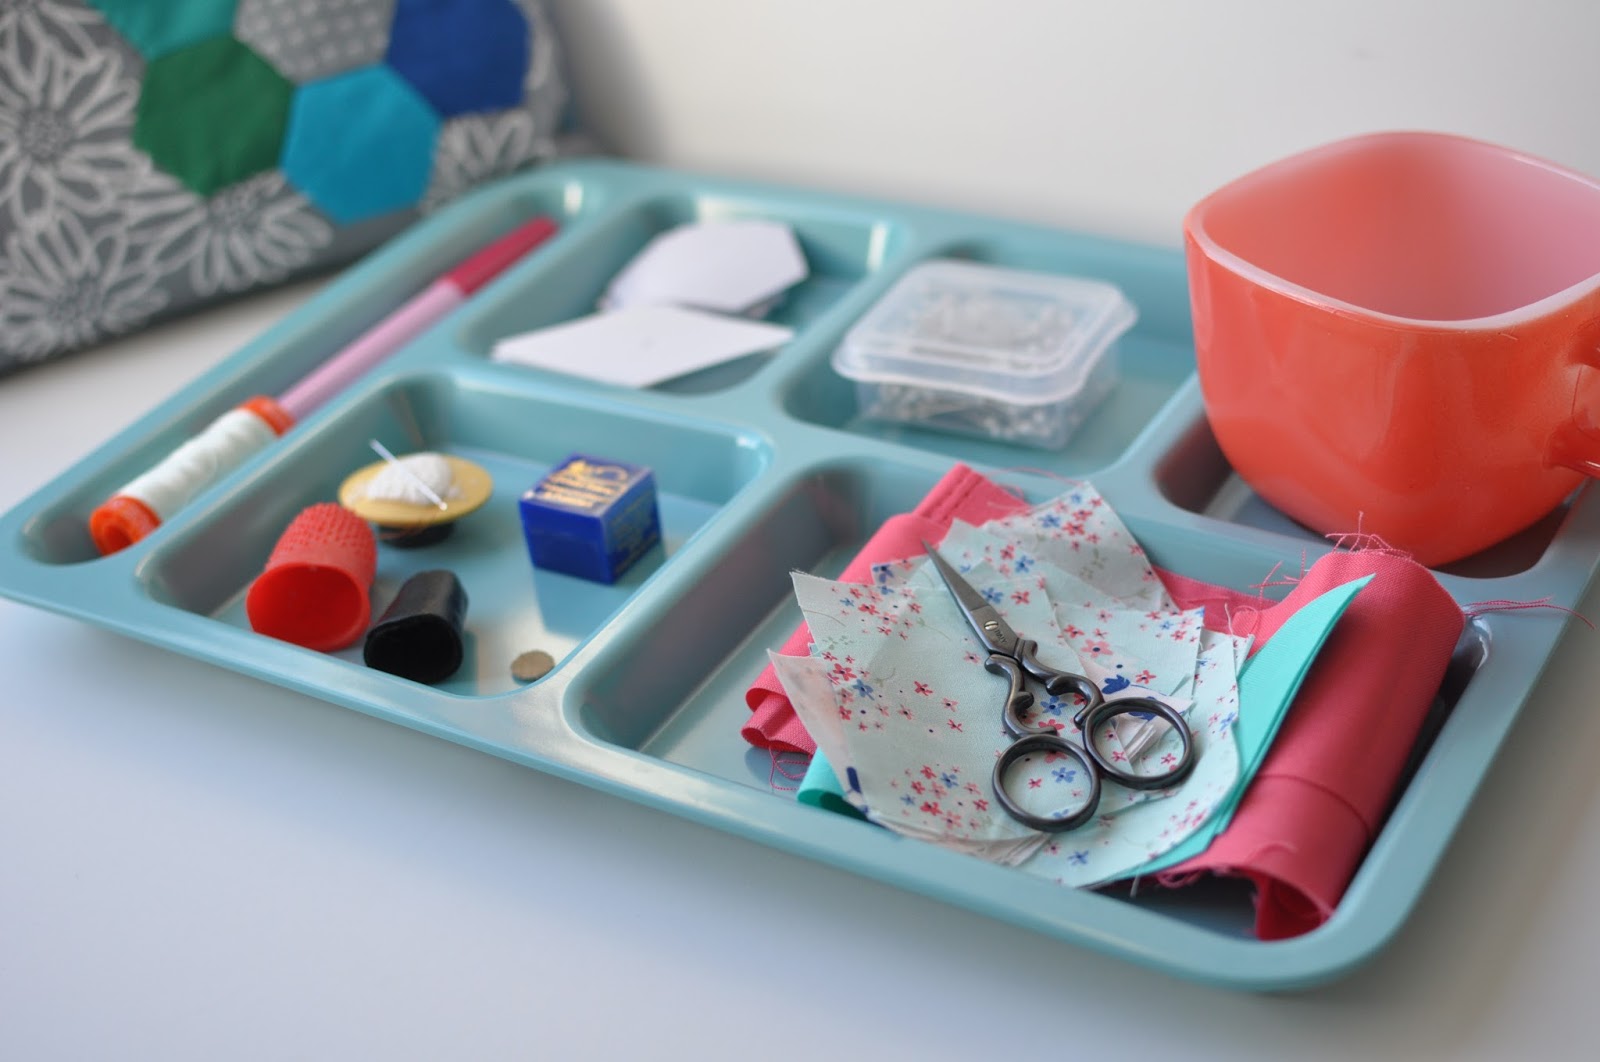
- Fabric Glue Pen
- 50 wt thread
- Thimbles
- Thread Conditioner
- Short Needle
- Templates
- Short Pins
- Fabric Scraps
- Small Scissors
- A place to hold your finished pieces
Let's talk Glue!
- Use FABRIC glue or SCHOOL glue so that it will wash out.
- Fabric glue has a dye that dries to clear. This dye makes it so that you can see where you have placed your glue. So handy!!
- A glue pen is super handy as it can be packed anywhere, is not messy, and contains the glue well. Liquid glue will get everywhere. Save it for glue basting bindings.
- NEVER NEVER NEVER iron your glue when glue basting EPP!! Ironing fabric or school glue sets it and will make it impossible to remove from your papers (you are gluing fabric to paper). Iron glue when glue basting bindings in order to set it and prevent it from slipping (you are gluing fabric to fabric). But never when EPP'ing with papers!!

Let's talk Thread!
- Use a 50 wt thread. 50 wt threads are light, so will show less as stitches, and are strong enough to stand up to actual use. I use Aurifil 50 wt in a color that matches as closely as possible to my fabric. I may use 10 or more different threads on one project! On this project I used Aurifil 2800, a very pale seafoam, and it blended perfectly with all of my colors. It is also less bright than an off white, so will reflect light less in case any does happen to show. Bonus!!
- Now is NOT the time to use old thread!! Get rid of it!! But keep the spools for photo shoots and pretty projects. Old thread disintegrates and will fall apart when your project is in use.
- To polyester or not to polyester?? That is the question. It's up to your personal taste. I use poly thread when I want more sheen in my work. Since I don't want any of my stitches to show when I'm constructing a piece, and steal attention from my finished product, I don't use polyester in construction. I WOULD use it to decorate all over my piller, though!!
Thimbles!
- I have arthritis in my hands, and thought that EPP would be an agony. But no!! It's a complete pleasure once you learn not to over grip. So, relax! Enjoy the process! Don't be in a hurry :)
- I use a leather thimble on my middle finger to push the needle through the fabric.
- I use a rubber machine quilting thimble/finger cover on my thumb because I wear a hole in my thumb pulling the needle through the piece, and guiding it along its course. Does this happen to anyone else?? I don't know!
- Check out that small circular thimble! It's leather, and sticks to anything and anyone you put it on. Then you can remove it and use it again and again! I LERVES them!! I do find that they slip around on my finger, but that is because I'm overgripping. Stop it!! Buy a pack and then come on back here and thank me ;)

Thread conditioner and a Needle keeper
- I like thread conditioner as it helps my thread not knot up as it moves through my piece, especially when I'm doing the whip stitch, around and around.
- Now, you can use spit. But don't tell us. It IS cool that your piece will bear your DNA imprint forever and may someday lead to the resolution of the mystery of where your piece was made and by whom.
- Or, you can always attach a label.
- I like a magnetic needle keeper because I think it's cool.
- It's super handy to be able to find your needle at any time and not worry that either you or the cat is sitting on it. Yikes! So if you don't have a needle keeper, or just aren't cool, a nice piece of felt wool works nicely. just put your needle into it every time you put it down.
Templates
- You can make your own templates, inherit them from a friend, or buy them online or at a store.
- I have paper and plastic of all densities. I like them all... I do prefer ones with a circle punched out in the middle, as they are easy to remove with a seam ripper (inserted into the circle) when you're done. You can get a hole punch and put holes in all of your templates. Or get the kids to do it as a rainy day activity if you don't care exactly how centered the holes are ;)

Pins!
- I use the short pins I've inherited from every quilter I know, over the years. Finally!! A use for them!!
- They don't need glass heads, as you're NOT going to iron them, right??
- You can also use paper clips if you find yourself poking yourself a lot. I keep popping the paperclips off, so it doesn't work for me. It does, however, amuse the cats to no end. Suit yourself.

Scissors and Fabric Scraps
- I use small scissors because they're portable and won't poke anything or anyone as they're carried about.
- Please use high quality fabric if your product is going to be washed!! If you're doing a mixed media piece, you'll want to stabilize your 'fabric' before you begin, rather than at the end.
- You can use scraps of any size so long as they are 1/4" bigger than your template, all of the way around. 1" hexies, anyone??

And Finally, a Place to Hold Your Finished Pieces!
- It is VERY important to keep your finished pieces clean and unbent. I like to have something pretty to put them into as I go along. It's part of the fun for me to choose something different for each project.
- I do find that bags, as charming as they are, do not keep my corners from getting besmirched. And who wants that??!! I've seen folks use Iphone boxes, fishing tackle boxes, bowls and deviled egg plates. All good. What will you use??

So, get all of your stuff together and BEGIN!
1. Pin your template to the center middle of your piece of fabric. Make sure you have enough to overlap by 1/4".


2. Condition your thread and pull it through the needle until three or so inches has no overlap. Do not knot the end!
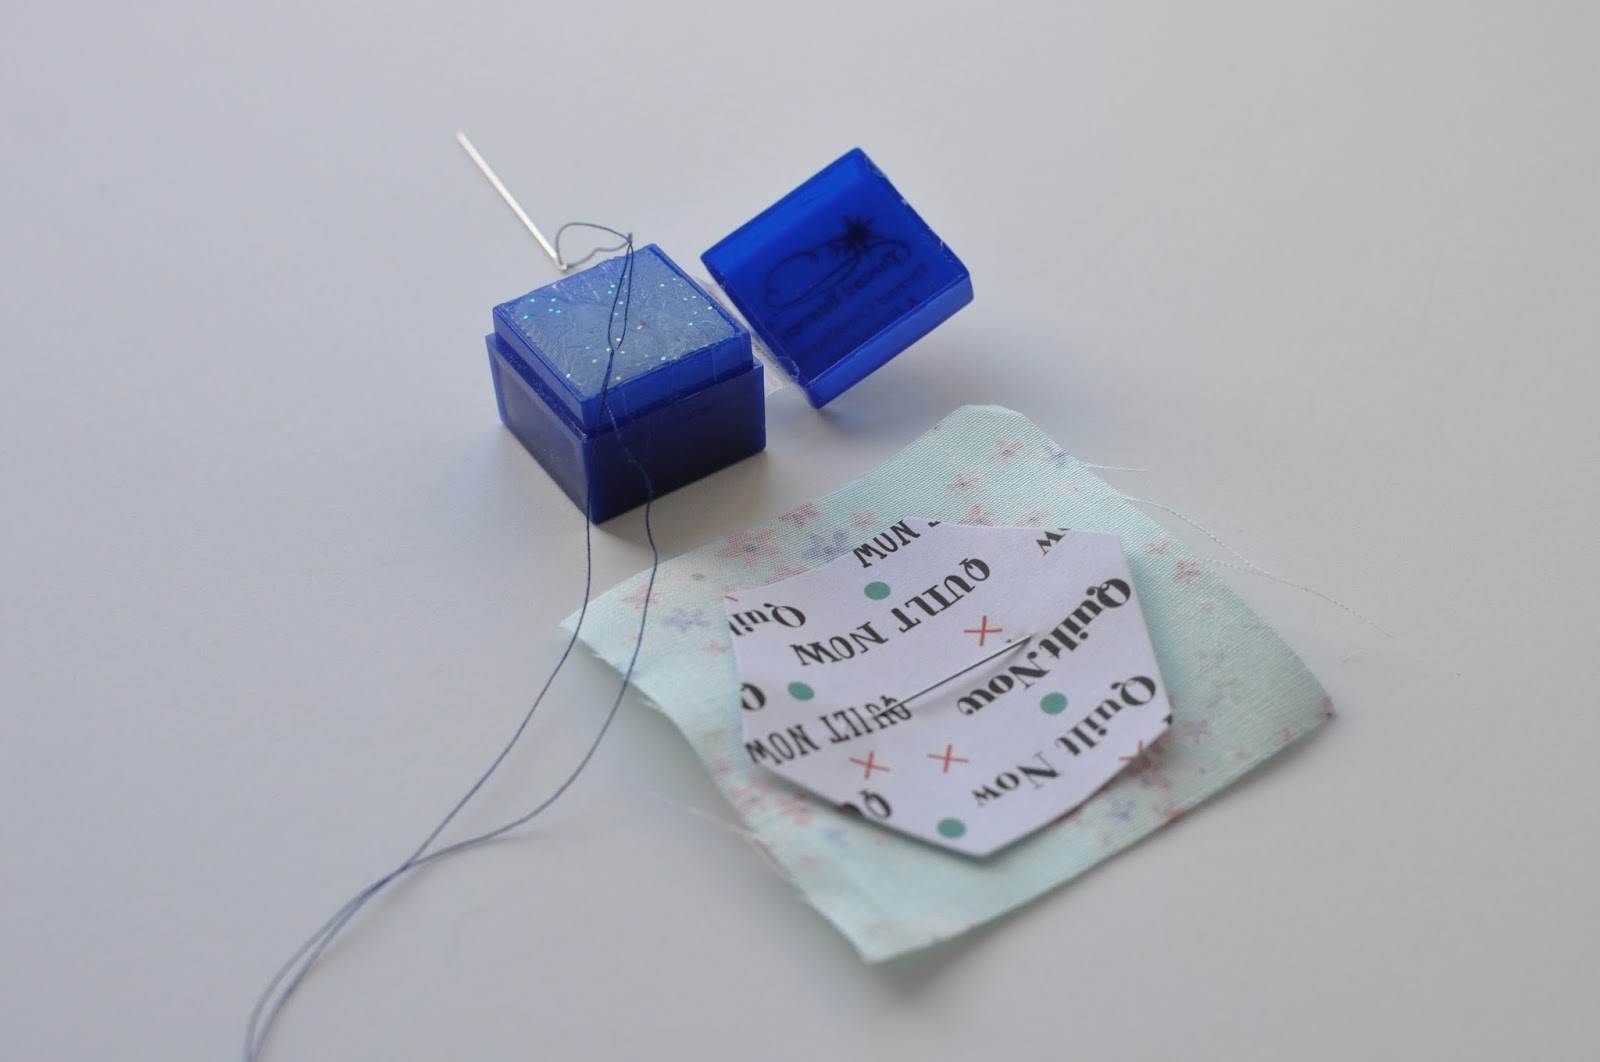
3. Lightly hold one pinned template fabric combo in your non-dominant hand. Fold one edge over onto the template and hold in place.
4. Fold the next flap, up from your initial flap, over onto the template.

5. Tack in place by inserting needle from the TOP Down, into the upper flap, and directly down into the lower flap, angling out as seen in the photo below. You WILL NOT be piercing or sewing into the paper!!

6. Hold the end of your thread and repeat your needle insertion


7. Move Upward to the next corner. Fold the fabric over onto the template and repeat inserting the needle top down into the fabric, and gently pulling the needle and thread through, keeping it to the right of the thread that forms the stitch (see below).


Congratulations!!
You've done your first EPP!!!!
Click here for Post Two: How to Glue Baste, and here for Post Three: How to assemble a project and how to assemble the Paperie Pillow of Lerve!
XX!
Lori

Wow! Great tutorials Lori! I am definitely a fan of thread basting. I do like to press my pieces before taking the papers out just to set everything in place so glue basting would be a bad thing in that case. :) I am just about to embark on a small EPP project to came over here because I remembered that you had written some tutorials.
ReplyDelete